Using RETS Connector With Trestle
RETS Connector is a simple to use RETS bulk data loading client for Windows. Whether you are new to RETS and need some help getting started or you already have an ETL process for dealing with bulk load RETS data, RETS Connector provides a set up wizard that walks you through the process.
Make a New Task
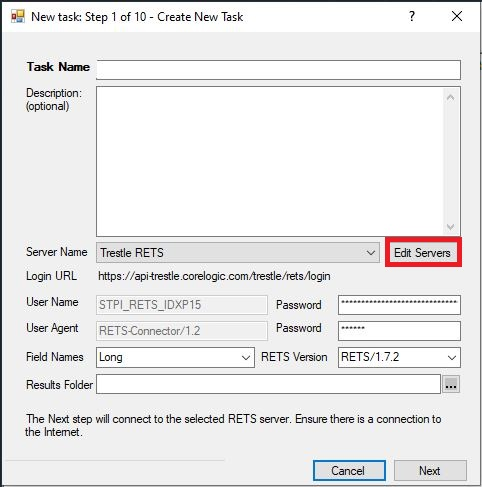
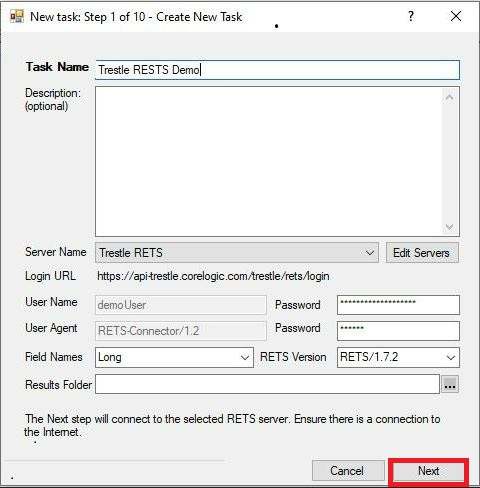
Once you have installed RETS Connector, you will be able to set up any number of Tasks to retrieve data from Trestle. To create a new Task in RETS Connector, go to the Task Menu and select the New item. When the New Task Wizard opens, no data will be populated in the fields. Provide a Task Name then click on the Edit Servers button shown in the following image:
Define a New Server
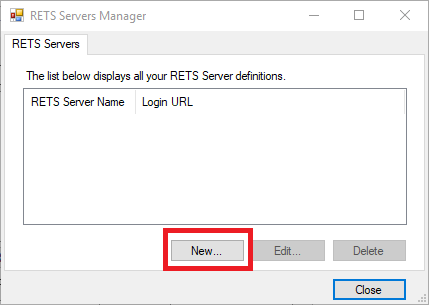
The list of RETS Servers will be empty until you have saved a RETS Server entry. Click on the New button to enter information for a server.
To define a new server, you will need to enter some information about the server as well as your User Name and Password. Update the following values:
| Name | Value to Enter |
|---|---|
| RETS Server Name | An easy to remember name that identifies the server, e.g. Trestle |
| Login URL | https://api.cotality.com/trestle/rets/login |
| User Name | Your client id for your RETS feed |
| Password | Your client secret for your RETS feed |
| RETS Version | RETS/1.7.2 |
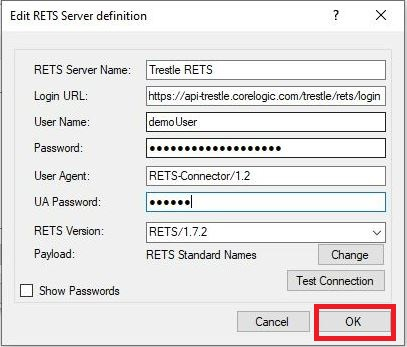
Once you have entered all of the required information for the RETS Server Definition, click the OK button. When you return to the RETS Servers Manager window, your new server will be listed. Click the Close button.
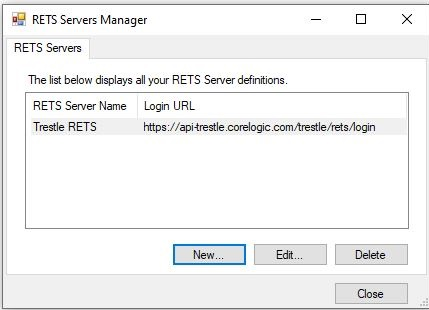
When you return to the Create New Task Wizard, you will have a RETS Server Definition entered. Select the server you want from the dropdown menu beside Server Name. The corresponding login information will automatically populate in the fields below. Then click Next.
Name the Search
In Step 2 of the wizard, enter a name for the Search Task you are creating. In the Class dropdown, select the type of data this specific Search will retrieve.

Once you have entered the correct information, press the Next button.
Enter Search Criteria
In Step 3 of the wizard, enter the search criteria. As you type a field name, the criteria list updates in realtime to show the list of appropriate fields. In the following picture, a user has entered “modi” to begin searching for fields that may contain the “Modification” or “Modifier” word. In this case, the user wants to add ModificationTimestamp to the list of criteria. By using the Operation dropdown and Value fields, the user has specified that the ModificationTimestamp bust by equal to or greater than August 1, 2018. Once the Operation and Value are set for the particular Criteria, press the Add Criteria button to save the Criteria for the search.
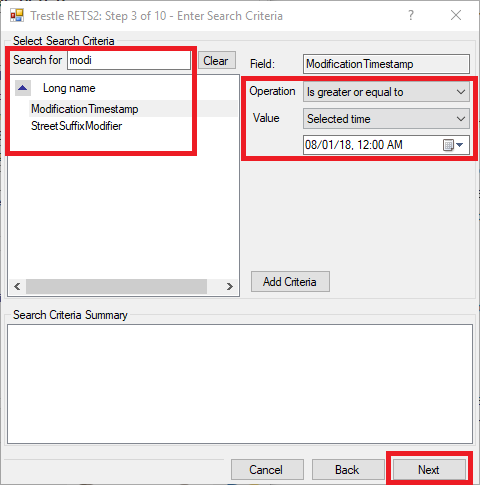
After all Criteria have been added, press the Next button.
Select Fields to Download
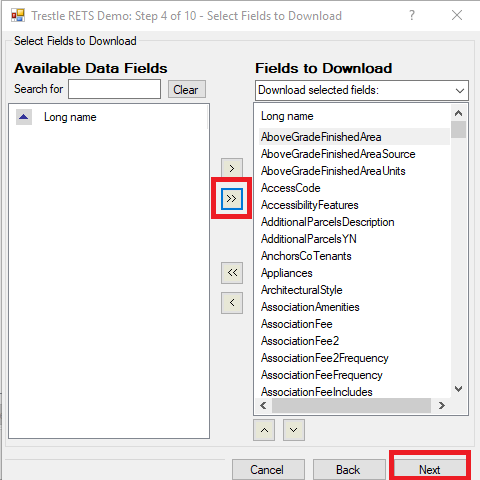
In Step 4 of the wizard, you can choose what fields to return for each record returned in the search. The picture below is for a Property search and the user has chosen to return all the available fields by clicking the >> button. This will result in hundreds of fields for each record. If you only want a few specific fields returned per record, it is recommended that you select those individual fields.
 Select the fields you want to download
Specify Data Format Options
Step 5 contains a very important set of options. The Data Selection section in the middle of the window is very important for effectively conducting searches that return large data sets. It is strongly recommended that you uncheck the Use Index to overcome server’s limits option and check the Use Offset to overcome server’s limits option. Then change the Batch size value to 500.
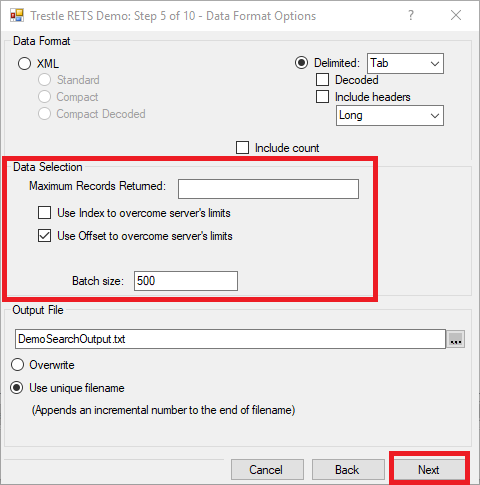
Other options such as Output File are dependent upon your preferences.
Finalize and Run the Task
The steps detailed so far in this walkthrough are required to execute an effective Search. All subsequent steps in the wizard define options that are entirely at the discretion of the user. Review the options in the subsequent steps and adjust them to your individual preferences. Once you have completed the wizard, your new Task will be present in the main RETS Connector window.
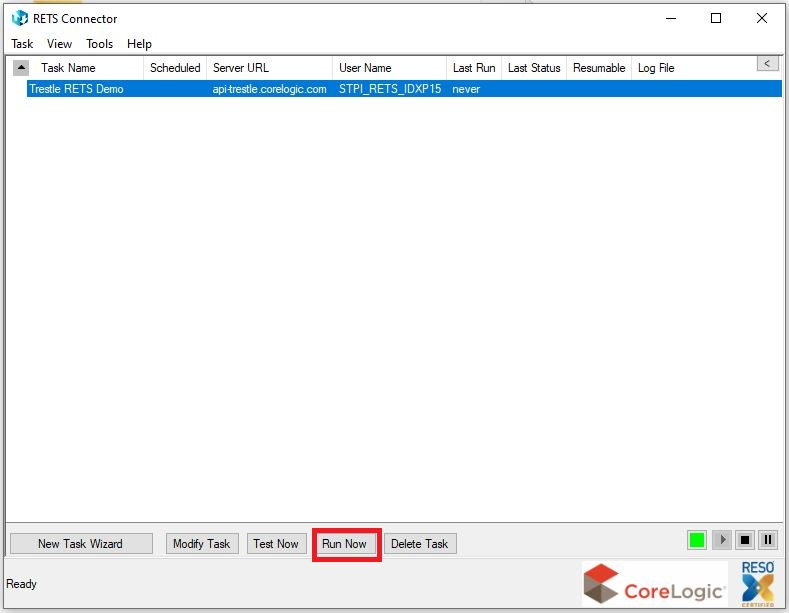
Select the Task you want to run and press the Run Now to begin processing for your Task.